Warm toes, warm heart. Pair 4 of 26 pairs for 2021

So, socks number 7 and 8 of my 52 socks for 2021 are now finished.

They’re knitted in the same brand of socks as that last gorgeous stripy slouchy pair (Novita 7 Veljesta) but this time, the heels and toes are worked with 7 Veljesta Pohjola, which also contains 30% Finnish wool and is DIVINE.

This pair (hence the title) will be part of my beloved husband’s Valentines present, helping keep his tootsies toasty in this crazily snowy winter we find ourselves surviving.

The pattern is the same as the slouchy ones, without the decrease before the heel, and with a rather experimental boomerang heel that doesn’t go all the way around the sock in the middle.

I think they came out rather well! Roll on 14th ❤️

Socks 5 and 6 of the 52 socks of 2021

I’m quite excited about these, for a number of reasons.

Let me list them for you:

  • They are super cosy and snuggly.
  • They are bright and cheerful.
  • They are, technically, worsted weight and therefore not quite as bulky as my other boot socks
  • THEY ARE MACHINE WASHABLE
  • They knit up really speedily.

They’re knitted in Novita 7 Veljesta Raita (self-striping) and Lappi (solid colour) on 4mm needles and one ball of self-striping, knitted as I did, does EXACTLY one pair. You’ll only use around 35g (around 70m) of the ball of solid colour.

Let me show you how much of a yarn chicken winner I was with these ones:

I’ve written up the pattern and it is available for a nominal fee of £1 for a while over here.

The Novita Raita self-striping yarn you can find here, and the Lappi solid colour is here.

Do share your pictures with me if you have a crack at them!

Happy knitting <3

Noro Striped Hat and Scarf

Having so much left, I knitted a hat to match which, with hindsight, I would probably have knitted a little longer for a squidge more slouch, but it fits perfectly and is super SUPER warm.
So, without further ado, this is how to knit it:

New beginnings…

As we hurtle towards the end of the year with ever-increasing, head-spinning, brain-curdling speed, and prepare to enter not just a new year but a new decade, I had a little epiphany.

Ok, epiphany may be over-egging the pudding. But the germ of an idea which I just couldn’t budge.

It’s time for me to shake things up a little, to rejig, to shift the focus of what I do, how I spend my time and how I go about things in life in general, but with no small regard to the woolly arts.

I have a Patreon account, which a few people have been kind enough to contribute to, in exchange for free access to patterns. I am giving it a bit of a rejig, so that the minimum contribution is the lowest tier of $5 a month and instead of publishing patterns, I shall put all the details up here, on my blog, of what I am making, how I have made it, the materials I have used, and the lessons I have learned along the way (all my existing patterns will, of course, still be for sale here). Naturally, I hope it goes without saying that nobody is obliged to contribute, but those who do will also receive for free all the existing patterns uploaded there, and occasional exclusive information / patterns / offers 🙂

To start us off, here is a little tea cozy I whipped up in about half an hour the other night. My husband is quite particular about his cuppa, and has a small white porcelain teapot which, until now, has been kept warm with one of the myriad knitted hats my now teenaged sons wouldn’t be caught dead in (Sigh… such is the lot of a knitting mum’s life). So he requested a tea cosy a while ago and a quiet night at the kitchen table afforded me the perfect opportunity to honour said request.

No photo description available.

Yarn: Paintbox wool mix super chunky.
Method (for a small teapot):

9mm circulars, magic loop method.

Cast on 32 stitches.
Knit 3 rounds of K1P1 rib, then knit around twice.
On one side of 16 stitches, knit back and forth in stocking stitch for 4 rows. Cut yarn and attach to other side and repeat 4 rows of stocking stitch on that side, then continue knitting around so you are back to knitting in the round.
Knit around 5 times.
Then decrease round 1) *knit 6, k2tog* around
2) *knit 5, k2tog* around
3) *knit 4, k2tog* around
4) *knit 3, k2tog* around
5) *knit 2, k2tog* around
6) *knit1, k2tog* around
7) *k2tog* around
Bind off and sew in ends.

Obviously, if your teapot is larger than our rather delicate, squat little thing, add a few more rounds, or a few more cast on stitches, to fit.

Happy teatime!

Next: I shall be sharing how I made this gorgeous little jumper and the hat that I am currently finishing to match it.

No photo description available.

Notes:

  • You can also, should you so wish, receive alerts to new posts / projects underway  etc by following me on Instagram or my Facebook page.
  • Occasionally a link will be an affiliate link, meaning that if you follow it and then make a purchase, I will receive a small commission. But please rest assured that I would not recommend or link anything I wasn’t completely delighted with myself 🙂

Free Pattern and Chunky Revival

I kind of cut my teeth on chunky. As much as I love DK / 4 ply / even sock yarn, I do sometimes lack the patience, and something I’ve started gets put aside in favour of a weekend speed-knit; a garment I can make and wear in a matter of days, sometimes hours.

After a couple of months of super-fine sock work, I found myself drawn once again to the speedy joy of a chunky jumper.

I posted my Super-Boxy Sweater a week or two ago and am happy to say it’s available for free for a short while, over here.

And it’s sparked a bit of a super chunky revival for me.

No sooner than this one was finished, and realising that the chilly spring will (hopefully) turn into a hot summer before we know it, I’ve been keen to keep going while I can, and am happy to introduce my Vintage Chic Sweater. To my mind, the colours are timeless, the stuff of your grandma’s china, or the sitting room curtains, or that frill my grandmother had around the bottom of the bed – no one does that any more, do they?! It was so beautifully frou-frou.

But I’m fast disappearing down a time-travel rabbit-hole of Vosene shampoo, pink bathrooms, Imperial Leather soap and thick white toast dripping with butter and honey. So back I come to introduce you to my beautiful jumper. Yup, all modesty aside, I think it’s a stunner.

It’s a gentle enough fair-isle for a first colourwork project, and it’s a jumper you could probably knit most of during (are you subjected to these on a regular basis, too?) a Lord of the Rings marathon.

The concept behind it, for me, too, is that I can chuck it on over a tee and jeans or skirt rather than reaching for a jacket on a chilly spring morning, but I’m truly looking forward to wearing it ALL next winter.

If you fancy a go at it yourself, you can find it over here.

In other news, I knitted up a speedy bolero which you may have seen on my instagram or elsewhere. I love it, but the pattern needs tweaking, so have some pics of the original draft for now 🙂

And next? I have two projects on the go – the first is my Vintage Chic Sweater in cotton aran, for a little girl, and a full-sized Vintage Pink Cardigan.

The Super Chunky Passion is not dying out any time soon 🙂

Happy knitting, lovelies! <3

Teddy’s Mittens (free pattern)

And Teddy walked to school in his mittens. Delighted. But probably mostly because of the snow.

Ted’s stripes

Having made a gazillion pairs of beauteous boot socks, I had a mega-tonne (well, not quite, but it certainly looked that way in the sitting room cupboard) of Drops Nepal and Drops Big Delight left, and it was as I was knitting the leg of a sock that it struck me… that would make an awesome sleeve. This is the one I was working on:

striped-socks1

So I found the cream and the blues and my measuring tape and set about measuring Ted.

He’s 6 – he’ll be 7 in August – and long and lean.

I decided that this one would be a bottom-up jumper, so: knitting from the bottom up to the underarm, then knitting the sleeves to that point, and joining them all on a circular needle to begin the raglan decreases up to the neck.

I worked out the gauge at 5 stitches and 6 rows per inch and jotted down everything I could think of that I’d need.

Around his tummy: 24″
Around his chest: 26″
From the nape of his neck to his bottom: 17″
From underarm to wrist: 13″
From shoulder to wrist: 18″
From underarm to bottom: 12″ and
Around his upper arm: 9″

I used 4mm circulars (80cm) for the 2×2 rib and switched to 5mm circulars for the rest of the piece.

Taking his widest point (his chest), I cast on 130 stitches (26″ x 5 sts per inch). With hindsight, I might have added another 5 for ease, though it does fit perfectly as you’ll see.

I knitted 6 rows of 2×2 rib on 4mm needles in Drops Nepal in cream and then switched to Big Delight and 5mm needles. The stripe pattern is 4 rows of Big Delight and then 2 rows of Nepal which 6-row repeat, most handily, is an inch.

Ted1

I repeated this until I got to 14″ (13 x 6-row stripes and the rib) and then put it aside (on stitch holders or waste yarn, or even on the needles if you have enough pairs) to knit the sleeves.

Again, using Nepal and 4mm needles, I cast on 44 stitches (9″ x 5 stitches per inch, then minus 1 to keep the 2×2 rib simple) and knitted 6 rows of 2×2 rib, switching then to 5mm needles and Big Delight. Since sleeves are always longer, I knitted 14 x 6-row stripes per sleeve.

So, to join the sleeves to the body:

First, I *put 10 stitches of the body stitches on waste yarn (this will be the underarm, which you will join to the sleeve with Kitchener stitch at the very end) and put 10 sleeve stitches on waste yarn. Then slip the remaining 34 sleeve stitches onto the main needles,  then slipped 55 stitches from the body** and repeated from * to **  I then had 178 stitches on the needles and placed a marker for the beginning of the round.

Using Nepal, I knitted two rounds.

Then I knitted around once in Big Delight and on the next round, to divide for the raglan decreases, I placed markers before the last stitch of the last round and after the first stitch of the next, knitted 53, placed a marker, knitted 2, placed a marker, knitted 32, placed a marker, knitted 2, placed a marker, knitted 53, placed a marker, knitted 2, placed a marker, knitted 32 and arrived back at the first marker.

Ted2

For the 3rd row of Big Delight, I began the decreases (you can see them underway above), very simply: knit 2 together before and after the 2-stitch raglan (between the two markers either side of the sleeves)

For the 4th row of Big Delight, knit around making sure to slip the markers.

And I continued the decreases every other row whilst sticking to the 6-row pattern (4 rows of Big Delight, 2 rows of Nepal) until I had only 1 stitch left in the sleeve sections (between the two markers).

Then I switched to 4mm needles and Nepal for 6 rows of 2×2 rib and finished with a super-stretchy bind-off. There’s little worse than putting all that effort in and being unable to get the blasted thing over yer head! 😉

Ted3

Maddeningly, Teddy was at school when it was finished (so inconsiderate!) so I had to wait until I was home from work and he home from school to take him back to the studio to get some pictures.

I think you’ll agree a) it’s very fetching and b) I may have overdone the pictures… Well – knitting and Teddy – two of my favourite things <3

Tabby Cattercushion (a free tutorial)

cattercushion16

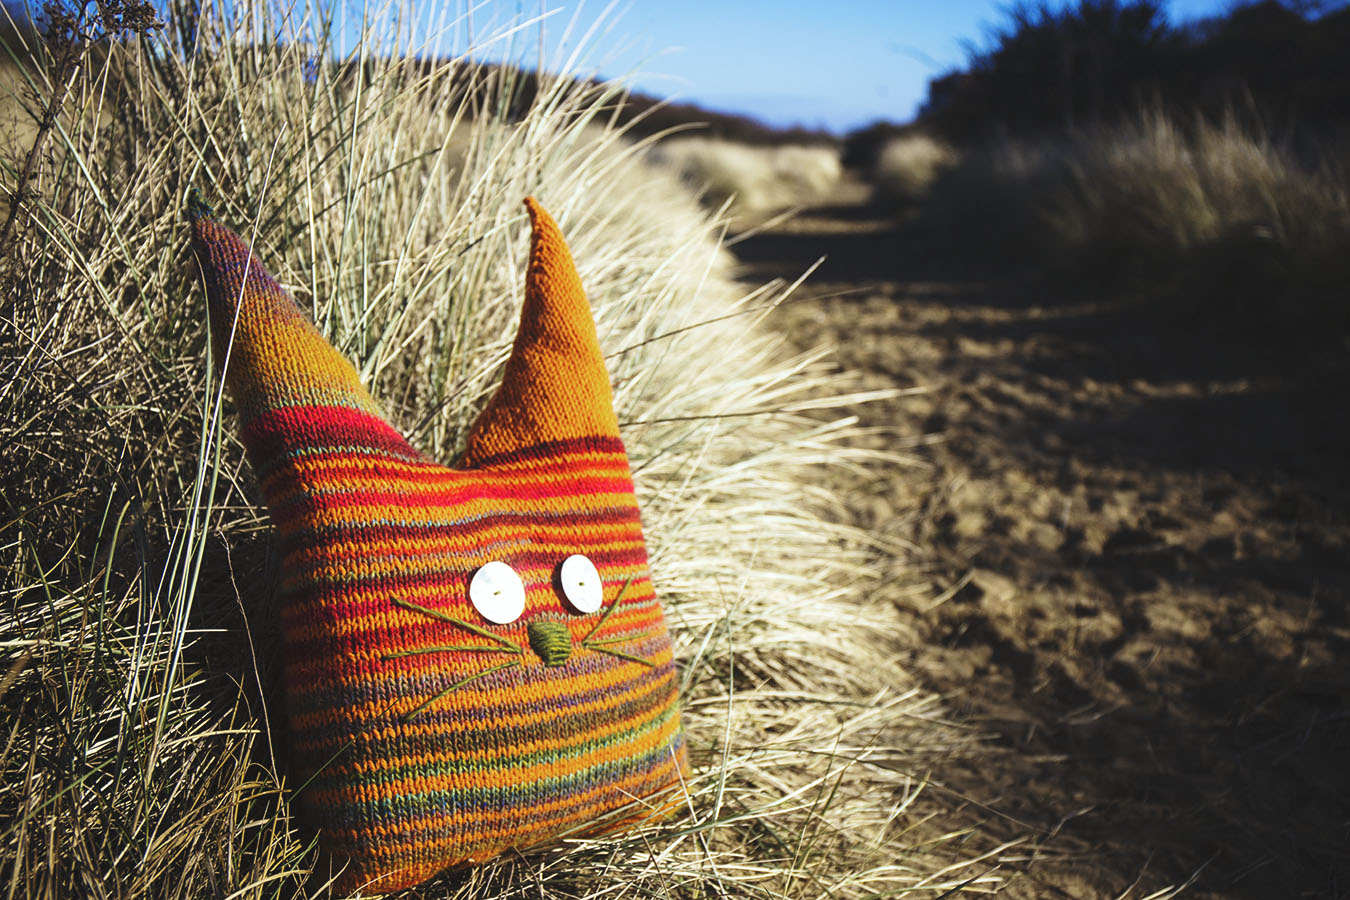
So I made a HUGE cattercushion.

Do you see what I did there? 😉

You can, of course make a gazillion of these (s)cattercushions so they can live up to their name, in a narrower gauge yarn, or chunkier, in all sizes and colours…

For this one, I used Schachenmayr Boston and Rico Creative Melange Chunky, 7mm circular needles and some enormous mother-of-pearl buttons. You’ll also need a cushion pad and some toy stuffing.

cattercushion4

If you fancy having a go at it, there is a free blow by blow tutorial over on the loveknitting blog. Just click here to be taken to it.

Here’s a picture of him with my Wilfy, for scale:

cattercushion17


You can download the tutorial by clicking on the link below.
Happy  knitting and enjoy the snuggles!


Hobbit Hat (free pattern)

I find myself here, on the beautiful North Norfolk Coast. Wide, sandy beaches, and sunshine that has taken us by surprise.

But… you know… it’s February.

How in the world did someone who knits hats not bring enough?!

15

My new moniker is, apparently, “The Wool Psycho”, so it goes without saying that needles and yarn had found their way into my essential packing list.

Quick – cast on!

27

This hat fits us all, from Teddy (aged 6, above) to me. Though it might be a bit of a stretch (no pun intended) for beloved husband, since his bonce is quite spectacularly large. Probably the brains 😉

For this hat, you will need a ball of Rico Creative Melange Chunky (in this case in CurryGreen), a 7mm circular needle and depending on your speed, a couple of movies.

hobbit-hat1

So without further ado:

Cast on 64 stitches and join in the round without twisting.
Knit 1 round, purl 1 round and knit the 3rd round.
Then begin the Knit2 Purl2 rib for 10 rounds. This gives a hat that is super slouchy without folding up the rim, or nice and snug if you do.

Knit for 34 rounds.

Then K2tog all the way around.

Then knit around.

Then K2tog all the way around again.

Cut the yarn leaving a long tail, then sew the tail through the live stitches and pull tight. Tie off securely and weave in the tail. Sew in the ends, and wear to your heart’s content.

Happy knitting! 🙂

hobbit-hat3